1. Rv ceiling ripples can be caused by a number of things, but the most common cause is improper installation.
2. If your RV has ripples in the ceiling, it’s important to have a professional inspect it and determine the cause.
3. In most cases, ripples in an RV ceiling can be repaired by simply re-installing the panels correctly.
However, if the damage is more severe, you may need to replace the entire ceiling panel.
- First, inspect the area to determine the size and location of the ripples
- If the ripples are small and few in number, they can probably be repaired with a putty knife and some joint compound
- Larger or more numerous ripples will require cutting out the affected area and patching it with new material
- To cut out the damaged section, use a sharp utility knife or a drywall saw
- Cut along the edge of the ripple, being careful not to damage any surrounding areas
- Once the damaged section has been removed, measure and cut a piece of new drywall to fit into the space
- Attach the new piece of drywall with screws or nails, then tape over all of the seams with drywall tape
- Apply joint compound to all of the seams and allow it to dry before sanding smooth and painting over it to match the rest of the ceiling
Rv Ceiling Vinyl
The RV ceiling vinyl is a type of covering that is used to protect the ceiling of your RV from damage. It is made from a durable material that is resistant to water, mold, and mildew. This type of covering can also be used to cover up any existing damage to your RV ceiling.
Rv Roof Sag under Air Conditioner
If you have an RV with an air conditioner, you may have noticed that the roof seems to be sagging in the area around the AC unit. This is a common problem that can be caused by a few different things.
One possible cause of roof sag around an AC unit is simply the weight of the AC unit itself.
If your RV’s AC unit is particularly large or heavy, it can put strain on the roof and cause it to sag. Another possibility is that the sealant around the AC unit has failed, allowing moisture to seep in and weaken the structure of the roof.
Whatever the cause, roof sag around an AC unit can be a serious problem.
If left unchecked, it can lead to serious damage to your RV’s roof and even collapse. So if you notice any sagging or bulging around your RV’s AC unit, don’t ignore it! Get in touch with a qualified RV technician right away to have them take a look and make any necessary repairs.
Repair, Rv Roof from Inside
RV roofs are built to last, but they can still develop leaks over time. If you find yourself with a leaky RV roof, don’t despair – it can be fixed! In most cases, you can repair a leaky RV roof from the inside without having to remove any exterior panels.
To begin, locate the source of the leak by checking for water stains on the ceiling or walls. Once you’ve found the general area where the leak is coming from, use a putty knife or similar tool to scrape away any caulking or sealant around that area. This will help ensure that you get a good seal when you apply new caulking.
Next, clean the area around the hole with rubbing alcohol to remove any dirt or debris. Then, cut a piece of self-adhesive flashing to size and apply it over the hole. Make sure that the edges of the flashing overlap onto solid roofing material so that no water can get underneath.
Finally, apply a generous bead of caulking around the edges of the flashing and smooth it out with your finger.
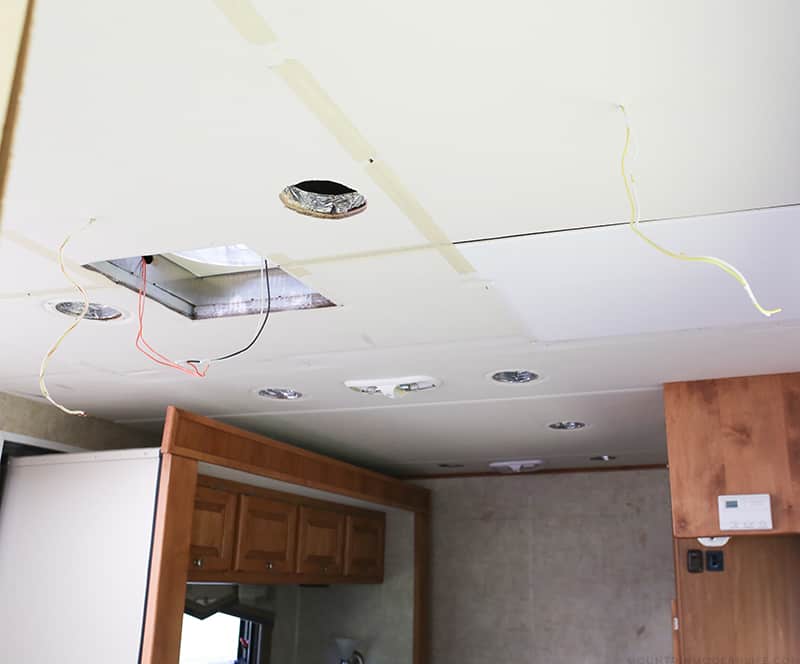
How to Remove Rv Ceiling Panels
RV ceiling panels are often made of thin, lightweight material that can be easily damaged or warped. If your RV ceiling panel is damaged, you may be able to remove it and replace it with a new one. Here’s how to remove an RV ceiling panel:
1. Start by removing any screws or fasteners that are holding the panel in place. If you can’t see any screws or fasteners, try gently prying the panel away from the ceiling with a putty knife or flat-head screwdriver.
2. Once the screws or fasteners are removed, carefully pull the RV ceiling panel down from the ceiling.
Be careful not to damage the surrounding area as you remove the panel.
3. With the old RV ceiling panel removed, you can now measure and cut a new one to fit in its place. Make sure to use a sturdy, lightweight material for your new RV ceiling panel so it doesn’t warp or sag over time.
Rv Ceiling Repair Cost
If you have an RV with a damaged ceiling, you’re probably wondering how much it’s going to cost to repair. The answer depends on the severity of the damage and the size of your RV.
If the damage is minor, such as a small crack or hole, you can expect to pay around $100-$200 for the repair.
If the damage is more severe, such as a large hole or water damage, you can expect to pay around $500-$1,000 for the repair.
Of course, these are just estimates and your actual repair cost may be higher or lower depending on the specific situation. If you’re concerned about the cost of repairs, it’s always best to consult with a professional before proceeding.
Credit: mountainmodernlife.com
How Do You Fix a Sagging Ceiling?
A sagging ceiling is usually the result of a water leak or some other type of damage that has caused the ceiling to become weak. In most cases, you will need to hire a professional to fix the problem. However, if the damage is not too severe, you may be able to fix it yourself.
The first thing you need to do is identify the source of the leak or damage. If it is due to a water leak, you will need to repair the leak before proceeding with any repairs to the ceiling. Once the leak has been repaired, you can begin working on fixing the sagging ceiling.
If the damage is not too severe, you may be able to simply use some heavy-duty adhesive tape to secure the loose edges of the ceiling back into place. However, if there is more significant damage, you may need to replace some of the damaged drywall. It is also possible that your entire ceiling will need to be replaced if it has been severely damaged.
Once you have repaired or replaced any damaged drywall, you should be able to finish repairing your sagging ceiling by taping up any loose edges and then painting over any visible imperfections.
How Do You Fix a Soft Spot in a Camper Ceiling?
If you have a soft spot in your camper ceiling, there are a few things you can do to fix it. First, you will need to determine the cause of the soft spot. If the soft spot is caused by water damage, you will need to repair the source of the leak before fixing the ceiling.
If the soft spot is simply due to age or wear and tear, you can patch it with drywall or fiberglass.
To repair a water damaged ceiling, you will first need to find and repair the source of the leak. Once the leak has been repaired, you can then begin repairing the ceiling.
To do this, you will need to remove any wet insulation and dry out the area completely. Once dry, you can then cut out any rotten wood or replace any damaged drywall. Once your repairs are complete, you can then prime and paint the area to match your existing ceiling.
To patch a hole in your ceiling, start by measuring the hole and cutting a piece of drywall or fiberglass to fit. Apply adhesive to both sides of the patch and press it into place over the hole. Use joint compound to smooth out any rough edges and let it dry completely.
How to Repair Rv Roof Membrane?
It is no secret that RVs can be quite expensive to maintain. One of the most common issues that RV owners face is a leaking roof. If not repaired in a timely manner, a leaking roof can cause significant damage to the interior of an RV.
The good news is that repairing a leaking RV roof is relatively easy and does not require special skills or tools. In most cases, all you need is some sealant and tape.
Here are the steps you need to take to repair your RV roof:
1. Inspect the area around the leak and look for any holes or cracks in the membrane. If there are any, use a utility knife to cut them open so they can be sealed properly.
2. Apply a generous amount of sealant around the hole or crack.
Make sure to apply it evenly so it can create a watertight seal when dry.
3- Use a piece of tape (preferably duct tape) to secure the area you just sealed off. This will prevent water from seeping through while the sealant dries up completely.
How Do You Fix a Sagging Rv Roof?
If you have a sagging RV roof, there are a few things you can do to fix it. First, check the roof for any leaks or damage. If there is damage, you will need to repair it before proceeding.
Next, prop up the roof with jacks or blocks so that it is level. Finally, use a sealant or coating to cover the entire roof. This will protect your RV from further weather damage and help prevent future sagging.
How to Fix a motorhome LeSharo RV repairs Ceiling Panel
Conclusion
If your RV’s ceiling is starting to show ripples, don’t panic! This is a common issue that can usually be fixed relatively easily. There are a few different methods you can try, depending on the severity of the problem.
For minor ripples, you may be able to simply smooth them out with your hands. If the ripples are more pronounced, you can try using a hairdryer or heat gun to gently heat up the area and then smooth it out. For more serious cases, you may need to remove the affected panel and replace it with a new one.
Whichever method you choose, take care not to damage the ceiling while trying to repair it!