To tighten a chain on a child’s bike, use a bike chain tool or a pair of pliers. Place the chain tool on the rivet that connects the inner and outer plates of the chain. Rotate the tool counterclockwise to push the pin out of the hole.
Pull the link apart and remove any excess links. Reattach the chain by threading it through the rear derailleur and around the sprockets. Use the bike chain tool to push the pin back into place.
- Unscrew the cap on the chain tensioner
- This is usually located on the rear axle of the bike
- Use a chain wrench to loosen the nuts that secure the rear axle in place
- Pull the axle back until there is about an inch of space between it and the frame of the bike
- This will give you enough room to work with the chain
- Place the chain around the sprockets and thread it through the derailleur
- Make sure that it is tight against both sprockets, with no slack in between them
- Use your hands to pull any excess chain through until there is only about an inch or so of slack remaining in the system
- Screw the tensioner back into place and tighten its nut securely
Tightening a Bike Chain
Bicycle chains need periodic adjustment to maintain optimal performance. The chain stretches as you ride, and can eventually become loose enough to slip off the gears. This not only makes pedaling more difficult, but can also damage your bike.
Here’s how to tighten a bike chain:
1. First, check to see if your chain is already too tight. There should be about an inch of play when you pull on the chain at the midway point between the top and bottom gears.
If there is less than an inch of play, or if the chain feels tight against the gears, it needs to be loosened slightly before proceeding.
2. To loosen the chain, find the bolt near the center of one of the links and turn it counterclockwise with a wrench until it is loose enough to pull apart by hand. You may need a second wrench to hold onto another part of the link while you turn this bolt.
Once the link is pulled apart, remove one half of it from the rest of the chain. Now you can rotate any part of thechain backward or forward along its length to take up slack. Reattachthe removed link ( making sure that its ends are aligned correctly)and then proceed to Step 3 below.
. If your chain was already atthe proper tension, simply skip aheadto Step 4 .
3 .
To tightenthe bicyclechain , startby findingthebolt ina middlelink andturningit clockwisewith awrenchuntilit feelstight(butdon’t overtighten !). Youmayneeda secondwrenchto hold anotherpartof themiddlelinkwhileyouturnthisbolt . Oftentimes , asthecenterboltisfastened , themainbodyof themiddlelink will rotateaswell— keep aneyeonthis so thatyou don’tuntightenthemiddlelinkby accident!
Onceyou have tightenedone middlelink ,check forproperslack againandrepeatSteps2 -4 asnecessaryuntilthechainissnares snuglybetweenallofthegearswithabout 1”of playwhenpulledat themidwaypoint betweenany twoadjacentgears . Don’tforgettoputoilonyour newlytightenedchain afterwards — happycycling!
How to Put a Chain Back on a Bike With a Chain Guard
If you have a bike with a chain guard, you may be wondering how to put the chain back on if it falls off. Fortunately, it’s not difficult to do and only takes a few minutes. Here’s what you need to do:
1. First, find the end of the chain that has the master link. This is the link that can be opened and closed without tools.
2. Next, thread the end of the chain through the front derailleur (if your bike has one) and then around the outside of the large gear on the crank set.
3. Now, bring the chain up and over the top of the small gear on the rear wheel axle, and then back down throught he derailleur (if present). You’ll want to make sure that the chain is tight against this small gear – but don’t overtighten as this can damage your gears.
4. Finally, reattachthe master link by aligningthe two halvesof th elinkand pushing them together until they snap into place.
You may need to use pliers for this step ifthe links are particularly tight.. And that’s it!
How to Tighten Chain on Bike With Gears
If you have a bike with gears, you’ll need to keep the chain tight in order to ride smoothly. Here’s how to do it:
1. Check the chain for looseness.
To do this, lift the chain off the ground and see if it droops more than an inch. If so, it’s time to tighten the chain.
2. Find the adjustment screws on the rear derailleur.
These are usually marked “H” (for high) and “L” (for low).
3. Use a screwdriver to turn the “H” screw clockwise until there is about 1/8 of an inch of space between the derailleur cage and the highest gear on your cassette. This will give you some slack in the chain so you can make your adjustments without over-tightening things.
4. Now turn the “L” screw counterclockwise until there is about 1/16 of an inch of space between the derailleur cage and lowest gear on your cassette. This will take up any slack in the system so that your gears shift properly when you’re pedaling hard uphill or downhill.
How to Make a Child’S Bike Easier to Pedal
Are you looking for ways to make your child’s bike easier to pedal? If so, you’ve come to the right place! Here are a few simple tips that can help:
1. Make sure the tires are properly inflated. This will help reduce resistance and make pedaling easier.
2. Check the chain and gears.
A well-maintained bike will be easier to pedal than one with a loose or dirty chain.
3. Teach your child proper cycling technique. Proper form can make pedaling much easier – especially on hills!
4. Choose an appropriate gear ratio for your child’s abilities. If the gears are too high, pedaling will be very difficult. Conversely, if the gears are too low, your child won’t be able to go very fast.
Finding the perfect balance is key!
5. Consider investing in a lightweight bike. Heavier bikes can be more difficult to pedal, especially for younger children or those just starting out.
How to Tighten a Bike Chain With a Derailleur
Bike chains can sometimes become loose, and if not tightened, can cause the bike to ride poorly. If you have a derailleur on your bike, you can use it to tighten the chain. Here’s how:
1. First, put the bike in its highest gear. This will give you more leverage to work with.
2. Next, find the adjustment screws on the derailleur.
There are usually two of them, one for tension and one for limit. The tension screw is usually marked “H” or “L”.
3. Use a Phillips head screwdriver to turn the tension screw clockwise until the chain is tight.
You may need to experiment a bit to get the right amount of tension. Too little and the chain will still be loose; too much and it will be too tight and could skip gears.
4. Once you’ve found the right tension, use the limit screw (usually marked “L”) to fine-tune things so that the chain runs smoothly through all gears without skipping or getting stuck.
Credit: www.youtube.com
Why Does the Chain Keep Falling off My Child’S Bike?
There are a few reasons why the chain might be falling off your child’s bike. It could be that the chain is too loose, the derailleur isn’t aligned properly, or there could be something wrong with the cassette.
If the chain is too loose, you can adjust it by tightening the bolts on the rear axle.
If the derailleur is out of alignment, you’ll need to adjust it so that it lines up with the cogset. And if there’s something wrong with the cassette, you may need to replace it entirely.
In any case, it’s always a good idea to take your child’s bike to a local bike shop for a tune-up.
This way, they can take a look at everything and make sure everything is in working order.
How Do I Adjust the Tension on My Kids Bike?
If you have a child who loves to ride bikes, you may be wondering how to adjust the tension on their bike. Depending on the type of bike and the size of your child, there are different ways to go about this. Here is a general guide on how to adjust the tension on your kids bike:
1. First, check what type of bike you have. If it is a BMX bike, then you will need to use an allen key to loosen or tighten the bolts that hold the handlebars in place. For other types of bikes, there will usually be a knob near the pedals that you can turn to adjust the tension.
2. Once you have located the adjustment device, it is time to make some adjustments! If your child is having difficulty pedaling, then try loosening the tension a bit. This will make it easier for them to pedal and should help them go faster as well.
However, if they are struggling to keep control of their bike or keep up with other cyclists, then you may want to tighten the tension slightly. This will give them more power when pedaling and help them stay in control while cycling. Just remember not to make any drastic changes – start with small adjustments and see how your child responds before making any big changes.
3. After making your adjustments, be sure to test out your child’s bike yourself before letting them ride off into the sunset! Get on and pedal around for a bit just to make sure everything feels good and that there are no loose parts that could come loose while they’re riding. Once you’re satisfied that everything is in working order, let them hit the road (or path) and enjoy their new-and-improved ride!
How Do You Tighten a Chain on a Mini Bike?
If your mini bike chain is too loose, it can come off while you’re riding, which can be very dangerous. Here’s how to tighten a chain on a mini bike:
1. Park the mini bike on a level surface and put the kickstand down.
2. Find the adjustment bolts on either side of the rear wheel. These are usually located near the axle or above the brake pads.
3. Use a wrench to turn both adjustment bolts clockwise until they’re tight against the wheel spokes.
The goal is to have about 1/2 inch of play in the chain when it’s at its tightest point. If there’s more than that, your chain is too loose and needs to be tightened further. If there’s less than that, your chain is too tight and could break while you’re riding.
4. Once you’ve adjusted both bolts, sit on the bike and see if the chain seems tight enough. If not, adjust one or both bolts again until it feels right.
How Do You Tighten a Bike Chain at Home?
You will need to have a few tools on hand before you get started: a chain whip, a derailleur hanger, and a cassette lockring tool. You will also need an adjustable wrench for the lockring tool.
1. First, you will need to remove the rear wheel of your bike.
To do this, disengage the brakes (if your bike has them) and then loosen the axle nuts with the adjustable wrench. Be sure to support the frame of your bike while you do this so that the wheel doesn’t fall off and damage anything.
2. Next, use the chain whip to hold onto the teeth of one of the cogs on your rear cassette (the cluster of gears at the back of your bike).
This will keep it from turning when you try to loosen the lockring that holds everything in place. Use the cassette lockring tool to loosen this ring (it is reverse threaded), and then remove it along with all of the cogs on your rear wheel.
3. Now take a look at your chain – it should have gotten quite loose after removing all those cogs!
Using your hands or an adjustable wrench, tighten up each side of any master link until there is no longer any slack in the chain itself (you shouldn’t be able to pull more than an inch or two out from either side).
4. Finally, re-install your rear wheel by reversing steps 1-2 above – be sure to check that everything is tight before heading out for a ride!
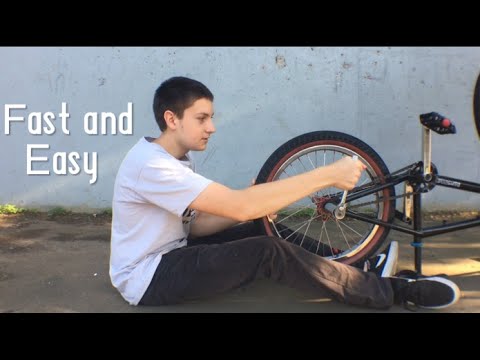
Repairing a Kid’s Bicycle Chain – Quick Fix on Tightening / Resetting a Bike Chain by DIYNate
Conclusion
The most important thing to remember when tightening a chain on a child’s bike is to make sure that the axle nuts are secure. If the axle nuts are not secure, the wheel can come off while riding, which could cause serious injury. Always check the axle nuts before each ride, and tighten them if they are loose.