Last Updated on December 10, 2022 by tawhid
If you’re like most RVers, you probably love customizing your rig with different decals. But what do you do when it’s time to remove them? Here are a few tips on how to remove RV decals without damaging your paint job.
The first thing you’ll need to do is make sure that the decals are clean and free of any dirt or debris. If they’re not, the adhesive won’t be as effective and the decals may not come off as easily. Once they’re clean, use a heat gun or hair dryer to heat up the adhesive behind the decal.
This will help loosen it up so that it’s easier to remove.
Start at one end of the decal and slowly peel it back at a 45-degree angle. If the decal starts to tear, stop and heat up that area again before continuing.
Once the decal is completely removed, use rubbing alcohol or Goo Gone to remove any residual adhesive.
- Begin by heating up the decal with a hair dryer
- Use a putty knife or razor blade to slowly peel back the decal
- If any adhesive remains, use Goo Gone or another similar product to remove it
- Wash the area with soap and water to remove any residue
Removing Old Cracked Decals
Do you have an old car with cracked decals that you want to remove? If so, there are a few things you need to know before getting started.
The first thing you need to do is clean the area around the decal.
This will help ensure that the adhesive remover works properly. Next, apply a generous amount of adhesive remover to a cloth and rub it over the decal. You may need to let it sit for a few minutes before proceeding.
Once the adhesive has been loosened, you should be able to peel the decal off relatively easily. If there are any stubborn pieces remaining, you can use a razor blade or putty knife to gently scrape them away. Finally, clean the area once again and enjoy your newly decal-free surface!
Removing Sun Baked Decals
Decals are a popular way to show support for your favorite team, or to advertise your business. But over time, decals can become sun baked and difficult to remove. Here are some tips on how to remove sun baked decals:
1. Use a heat gun or hair dryer to soften the adhesive backing. This will make it easier to peel off the decal.
2. Use a utility knife or razor blade to carefully scrape off the softened adhesive.
3. Apply Goo Gone or another adhesive remover to any remaining residue. Let it sit for a few minutes, then wipe it away with a clean cloth.
4. If there is still stubborn residue left behind, try using WD-40 or rubbing alcohol.
How to Remove And Install Rv Decals
RV decals can be a great way to show off your individuality and style, but they can also be a pain to remove and install. If you’re looking to change up the look of your RV, here’s a step-by-step guide on how to remove and install RV decals.
What You’ll Need:
-A heat gun or hair dryer
-A plastic putty knife or razor blade
-Soap and water
-Rubbing alcohol (optional)
Instructions:
1. Start by heating up the area around the decal with a heat gun or hair dryer.
This will help to loosen the adhesive and make removal easier.
2. Once the area is heated, use a plastic putty knife or razor blade to gently scrape away at the decal. Be careful not to damage the surface of your RV as you do this.
3. Once the majority of the decal has been removed, you can use soap and water (or rubbing alcohol) to clean away any residual adhesive.
4. If you’re installing new decals, start by cleaning the area where they’ll go with soap and water (or rubbing alcohol). This will help ensure that the newdecals adhere properly.
How to Remove Cracked Decals from Rv
If you are like most RVers, you probably have a few cracked decals on your rig. Here is an easy way to remove them without damaging the paint.
1. Start by heating the decal with a hairdryer or heat gun.
This will help loosen the adhesive and make it easier to remove.
2. Use a putty knife or other sharp object to gently scrape the decal off of the surface. Be careful not to scratch the paint beneath.
3. Once the decal is removed, use a cleaner designed for removing adhesive residue to clean up any remaining glue.
With just a little time and effort, you can easily remove those unsightly cracked decals from your RV!
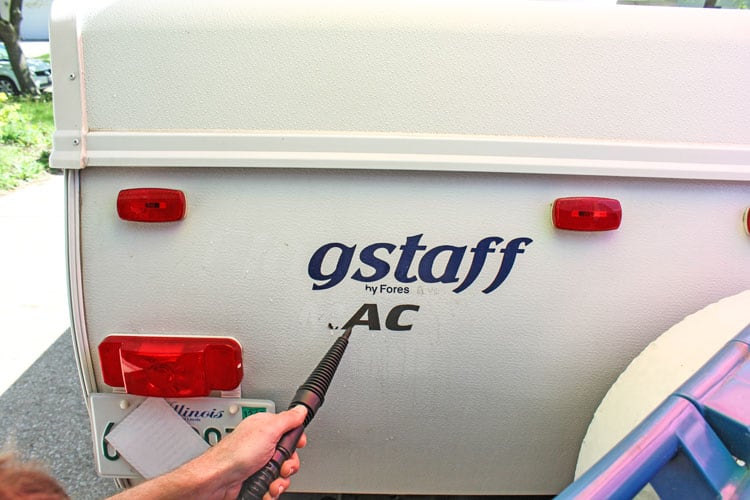
Goo Gone Rv Decal Removal
If you’re like most RVers, you probably have a few decals on your rig. And, if you’re like most RVers, you’ve probably had to deal with the annoying task of removing them at some point.
Well, there’s an easy way to remove those pesky decals without damaging your paint or spending hours scrubbing.
All you need is a can of Goo Gone and a little patience.
Here’s how to do it:
1. Spray a generous amount of Goo Gone onto the decal.
Let it soak in for a few minutes.
2. Use a putty knife or other sharp object to scrape the decal off. Start at one corner and work your way around until the entire decal is removed.
3. Wipe away any residual Goo Gone with a clean cloth. That’s it! Your paint should be good as new and free of any sticky residue.
Credit: letscampsmore.com
What Removes Decals from Rv?
If you’re looking to remove a decal from your RV, there are a few things you’ll need to keep in mind. First, you’ll need to make sure that the decal is firmly attached to the surface. If it’s not, then you run the risk of causing damage to the paint or finish.
Once you’ve confirmed that the decal is secure, you can begin the removal process.
There are a few different ways to go about removing a decal from an RV. One popular method is to use heat.
This can be done with a hair dryer or by using a heat gun. You’ll need to be careful with this method, as too much heat can damage the surface beneath the decal. Another option is to use a chemicals designed specifically for removing decals and stickers.
These can be found at most hardware stores and will usually come with instructions on how to use them safely.
Whichever method you choose, taking your time and being careful will help ensure that you don’t damage your RV in the process of removing a unwanted decal.
How Do You Remove Old Cracked Rv Decals?
If your RV decals are starting to peel or crack, it’s time to remove them. Here’s how:
1. Start by heating up the decal with a hairdryer or heat gun.
This will help loosen the adhesive and make removal easier.
2. Use a putty knife or razor blade to gently scrape the decal off of the surface. Be careful not to damage the paint underneath.
3. If any adhesive remains, use a commercial cleaner designed for removing sticky residue. Follow the instructions on the cleaner and be sure to rinse well afterwards.
4. Finally, wash and wax the area where the decal was removed to help protect the paint from further damage.
How Do You Remove Old Decals from Fiberglass?
If you’re trying to remove an old decal from fiberglass, there are a few things you can do to make the process easier. First, try heating up the decal with a hair dryer or heat gun. This will help to loosen the adhesive and make it easier to peel off.
If that doesn’t work, you can try using a razor blade or putty knife to gently scrape away at the decal. Be careful not to scratch the fiberglass surface beneath. You may also want to use a commercial adhesive remover if nothing else seems to be working.
Just apply it according to the instructions and then scrub at the decal until it comes off.
How Do You Remove a Decal Without Damaging Paint?
Decals are a great way to show your personality and style, but they can be difficult to remove. If you’re trying to remove a decal without damaging paint, there are a few things you can do.
One option is to use heat.
You can use a hair dryer or heat gun on low heat to slowly loosen the adhesive holding the decal in place. Once the adhesive is loosened, you should be able to peel the decal off relatively easily.
Another option is to use chemicals.
There are a variety of products available that can help dissolve the adhesive holding the decal in place. Be sure to read the labels carefully and follow the instructions before using any chemicals, as some can damage paint if used incorrectly.
If neither of these options work, you may need to resort to sanding or scraping off the decal.
This will likely damage some of the paint underneath, so it’s not ideal but it may be necessary if other methods haven’t worked. Be sure to test an inconspicuous area first before proceeding with this method over your entire vehicle.
How To Remove Cracked RV Graphics || RV Renovation || RV Decals
Conclusion
Are you looking to remove your RV decals? If so, here is a step-by-step guide on how to do it!
First, start by heating up the decal with a hair dryer.
This will help to loosen the adhesive.
Next, use a putty knife or credit card to slowly scrape off the decal. If the decal is proving difficult to remove, you can try using Goo Gone or another similar product.
Once the decal has been removed, use soapy water and a sponge to clean off any residual adhesive. Finally, buff the area with a microfiber cloth until it shines!