Last Updated on August 7, 2023 by tawhid
If you need to remove your bike crank without a puller, you can do so by using a hammer and a block of wood. First, place the block of wood against the end of the crank arm. Then, lightly tap the end of the crank arm with the hammer until it loosens from the spindle.
Once it is loose, you should be able to unscrew it by hand.
- Remove the bolts that secure the crank arm to the bottom bracket
- Use a crank arm puller to remove the crank arm from the spindle
- If you don’t have a crank arm puller, you can use a hammer and punch to drive the spindle out of the crank arm
- With the spindle removed, you can now slide the crank arm off of the bottom bracket
Bicycle Crank Puller Homemade
Are you in need of a bicycle crank puller but don’t want to spend the money on one? Or maybe you’re just the handy type that likes to make things yourself. Either way, we’ve got you covered with this tutorial on how to make your own bicycle crank puller!
What You’ll Need:
-1/2″ diameter x 3″ long bolt
-1/2″ diameter washer
-1/2″ diameter nut
-Two 1/4″ washers
-Piece of scrap wood (approximately 3″x5″)
Instructions:
1. Start by threading the bolt into the nut. Leave about an inch of thread exposed past the nut.
2. Place the washers onto the bolt, followed by screwing on the crank arm until it is tight against the washers. If your bike has a dust cover over the end of the axle, you will need to remove this first. Otherwise, just screw on until tight.
On most bikes, lefty loosy and righty tighty applies here! With everything tightened down, your set up should look like this photo below.
Shimano Crank Removal Without Tool
Shimano is one of the most popular brands of bicycle components, and their cranks are used on many different types of bikes. If you need to remove your Shimano crank for any reason, you can do so without needing a special tool. All you need is a few common tools that you probably already have around the house.
To remove your Shimano crank, first flip your bike over so that it’s resting on the handlebars and seat. This will make it easier to access the crank bolts. Then, use an adjustable wrench to loosen the left-hand crank bolt.
You may need to use a little bit of force to get it started, but be careful not to strip the bolt head. Once the left-hand bolt is loose, remove it completely and set it aside.
Next, use your adjustable wrench to loosen the right-hand crank bolt in the same way that you loosened the left-hand bolt.
Once this bolt is also loose, remove it and set it aside with the other one. At this point, you should be able to simply pull the crank arm off of the spindle. If it’s stuck or won’t come off easily, try using a rubber mallet or hammer to lightly tap on the end of the crank arm until it pops free.
And that’s all there is to removing a Shimano crank without needing a special tool! With just a few simple steps and some common household tools, you can easily take care of this task yourself.
How to Remove Bicycle Crank Bearings
If you’re having trouble removing your bicycle crank bearings, don’t worry—it’s a common problem. Here are some tips on how to remove them without damaging the bearings or cranks:
1. Use a bearing separator tool.
This is a specialized tool that helps to separate the bearings from the crank arm.
2. Insert the end of the tool into the bearing and turn it clockwise until it pops out. Repeat this step for the other side of the bearing.
3. Once both sides of the bearing are removed, use a pair of pliers to remove any remaining debris from inside the crank arm. Be careful not to damage the threads in the process.
4. Finally, re- grease the bearings and reinstall them in the opposite order that you removed them.
Bicycle Crank Puller near Me
If you’re looking for a bicycle crank puller near you, there are a few places you can check. Your local bike shop is a great resource, and they may even have a crank puller that you can borrow or rent. Another option is to check online retailers or forums – many cyclists sell their used equipment on these platforms.
Finally, if you know another cyclist in your area, they may be able to help you out or point you in the right direction.
Shimano Crank Removal Tool
If you’re a cyclist, then you know that one of the most important parts of your bike is the crank. The crank is what helps power your pedaling, and it’s essential for a smooth ride. But over time, cranks can become worn down and need to be replaced.
That’s where the Shimano Crank Removal Tool comes in!
This handy tool makes it easy to remove and replace your Shimano crankset, so you can keep cycling along smoothly. It’s simple to use – just attach the removal tool to your crank arm and unscrew.
Then you can easily install your new Shimano crankset with the included installation tool.
The Shimano Crank Removal Tool is an essential piece of equipment for any cyclist looking to maintain their bike. With this tool, you can keep your crankset in tip-top shape for years to come!
Credit: www.bsxinsight.com
How Do You Remove a Square Taper Crank Arm Without a Tool?
If your bike has a square taper crank arm and you need to remove it without a tool, here’s what you’ll need to do. First, locate the retaining nut on the back of the crank arm. This is typically a large nut that holds the crank arm in place.
Once you’ve located the retaining nut, use a wrench to loosen it until it’s loose enough to turn by hand.
Once the retaining nut is loose, you should be able to pull the crank arm off of the spindle. If there’s any resistance, try wiggling the crank arm back and forth until it comes free.
With the crank arm removed, you’ll be able to access the bearings and make any necessary repairs or replacements.
How Do You Remove a Bike Pedal Crank?
Assuming you want to know how to remove a bike pedal crank in order to replace it:
The first step is to loosen the axle bolts that hold the crank arms onto the spindle. You will need a wrench that fits the bolt heads.
Once the bolts are loosened, you can unscrew them by hand and remove the crank arms from the spindle. Next, use a bottom bracket tool to remove the bearings from their cups in the frame. With the bearings removed, you can now pull out the spindle from its housing in the frame.
To install a new pedal crank, reverse these steps.
What Tools Do I Need to Remove Crankset?
Assuming you don’t already have the tools:
To remove a crankset, you will need:
-A crank extractor (this is a tool that threads onto the end of the crank bolt and pulls the entire crankset off)
-A bottom bracket wrench (this tool is used to loosen/tighten the bolts that hold the bottom bracket in place)
-An allen key set (used to remove bolts/screws)
How Do You Loosen a Crank Arm?
If you’re new to bike maintenance, loosening a crank arm may seem like a daunting task. But with a few simple tools, it’s actually quite easy! Here’s what you’ll need:
– A wrench that fits the bolts on your crank arms. If you don’t have one, you can usually find one at your local bike shop.
– A clean rag or paper towel
– Some WD-40 or other lubricant (optional)
1. First, make sure your bike is in a stable position so that it doesn’t fall over while you’re working on it. You can either lean it against a wall or flip it upside down and rest it on the handlebars and seat.
2. Next, locate the bolts that hold the crank arms in place. On most bikes, there will be two bolts – one on each side of the bottom bracket (the part where the pedals attach).
3. Using your wrench, loosen each bolt a few turns until they are loose enough to remove by hand.
Be careful not to completely remove the bolts – just loosen them so that you can unscrew them by hand later.
4a. If your bike has cotterless cranks (cranks that don’t use cotter pins), then you can simply unscrew the crank arms at this point and pull them off.
4b. If your bike has cottered cranks (cranks that use cotter pins), then things are a bit more complicated. You’ll need to first remove the dust caps from each side of the bottom bracket using your fingers or a small screwdriver/pliers (be careful not to lose these!).
Once the dust caps are removed, you should be able to see the cotter pins holding each crank arm in place.
5a. To remove a cottered crank arm, first straighten out any bent parts of the cotter pin using needle nose pliers or a small hammer if necessary. Then use pliers to grip onto one end of the cotter pin and pull it out of its hole in the crank arm (it may take some wiggling back and forth to get it started). Repeat this process for the other side of the crank arm and then pull it off entirely.
5b*.
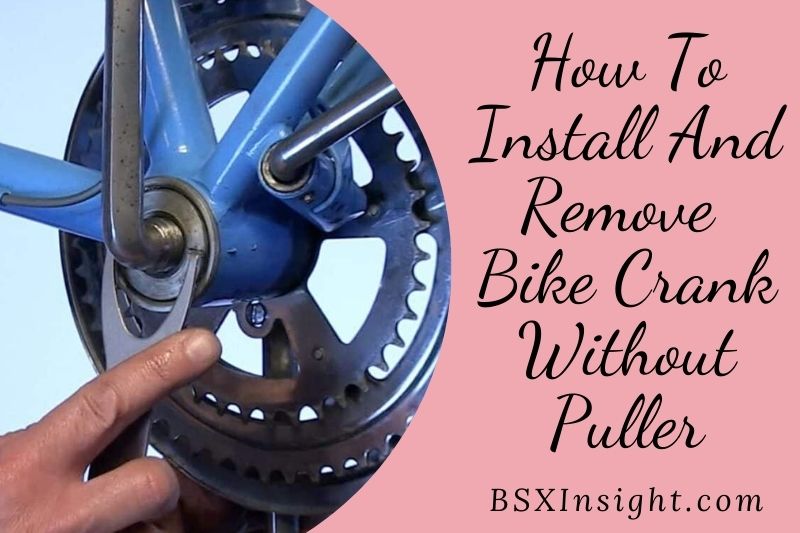
Remove Cranks Without A Crank Puller
Conclusion
If you need to remove your bike crank without a puller, there are a few ways you can do it. One way is to use a hammer and punch to drive the crank out from the bottom side. Another way is to use a vise and block of wood to hold the crank while you unscrew it from the spindle.
Whichever method you choose, make sure that you are careful not to damage the threads on the spindle.