Last Updated on April 5, 2023 by tawhid
Use a mallet and chisel to score the corner of the trim. Place the chisel on the trim at a 45-degree angle and tap it with the mallet until you’ve made a deep groove in the trim. Next, use a saw to cut along the scored line.
Finally, use sandpaper to smooth out any rough edges.
- Cut the RV corner trim to the desired length with a hacksaw
- Place the trim on a work surface, and mark where you want it to bend with a pencil
- Apply heat to the area you marked with a heat gun or hair dryer, and bend the trim to the desired shape
- Allow the trim to cool before installing it on your RV
Bending Aluminium Strip
Aluminium is a popular metal for use in a variety of applications, including: jewellery making, model making, aircraft construction and electronics. It is also frequently used in the food and beverage industry. Aluminium strip is widely available and relatively inexpensive, making it a good choice for many projects.
Bending aluminium strip can be done using a variety of methods, depending on the thickness of the strip and the desired shape. For thicker strips of aluminium (3mm or more), it is possible to bend the metal by hand. First, mark out the desired shape on the aluminium with a pencil or marker pen.
Next, place the metal on an anvil or other hard surface. Finally, use a hammer to carefully bend the aluminium along the marked line.
For thinner strips of aluminium (<3mm), it is necessary to use a jig or template to ensure that the bends are precise.
First, fix the jig or template in place so that it cannot move during bending. Next, place the aluminium strip against the jig/template and slowly bend it around until it takes on the desired shape. Once all bends have been made, remove the strip from the jig/template.
Bending aluminium strip can be tricky and care must be taken to avoid creasing or breaking the metal.
Aluminum Camper Corner Trim
If you are looking for a way to add a little extra protection to your camper, then aluminum camper corner trim is a great option. This type of trim is designed to fit over the corners of your camper, and it can provide an extra layer of protection against bumps and scrapes. In addition, aluminum camper corner trim can also give your camper a nice finished look.
There are a few things to keep in mind when choosing aluminum camper corner trim. First, you want to make sure that the trim is compatible with the material of your camper. Second, you will need to decide how much coverage you want.
Finally, keep in mind that aluminum camper corner trim can be somewhat difficult to install, so it is best to hire a professional if you are not confident in your abilities.
Bendable Aluminum Trim
If you’re looking for a versatile and stylish trim option for your home, look no further than bendable aluminum trim! This type of trim is perfect for use on both indoor and outdoor projects, and it comes in a variety of colors to suit any aesthetic. Plus, bendable aluminum trim is easy to install and can be cut to fit any space.
Whether you’re using it to accentuate a piece of furniture or add some flair to an otherwise mundane space, bendable aluminum trim is sure to make a statement. And because it’s so versatile, it’s also an affordable option for those on a budget. So if you’re looking for a way to add some personality to your home without breaking the bank, consider bendable aluminum trim!
How to Bend Angle Aluminum 90 Degrees
Angle aluminum can be used for a variety of purposes, including brackets, frames, and supports. Often times you will need to bend angle aluminum in order to achieve the desired shape or fitment. While 90 degree bends are the most common, you may sometimes need to make shallower or deeper bends.
The first thing you need to do is measure the piece of aluminum that you will be bending. You’ll need to know the length, width, and thickness of the metal in order to choose the appropriate size die for your bender. Next, set up your bender according to the manufacturer’s instructions.
Place the aluminum in the bender with the area that you want to bend facing up. Slowly start to apply pressure to the handle until the metal starts to bend. Continue until you’ve achieved your desired angle.
If you’re not sure how much pressure to apply, err on the side of too little rather than too much. It’s easier to make additional passes through the bender if needed than it is to try and fix an over-bent piece of metal. Once you’re done bending, remove the aluminum from the bender and inspect your work.
If everything looks good, then you’re all set!
Aluminum Trim Molding
If you’re looking to add a touch of class to your home’s exterior, aluminum trim molding is a great option. This type of molding is available in a variety of styles and colors, so you can find the perfect match for your home. Aluminum trim molding is also very durable, so you won’t have to worry about it fading or chipping over time.
Credit: gonecamping.net
How Do You Bend Camper Trim?
If you have ever had to replace the trim on your RV or travel trailer, you may have been surprised to find that it is not as easy as it looks. In order to get the trim to lay flat and look good, you will need to know how to bend camper trim. Here are a few tips on how to do this:
1. Use a heat gun: This is probably the easiest way to bend trim. Simply aim the heat gun at the area of the trim that you want to bend and hold it there for a few seconds. The heat will cause the plastic to become pliable and you can then use your hands or a tool to shape it into the desired shape.
Just be careful not to overdo it with the heat gun, as too much heat can damage the trim.
2. Use boiling water: Boiling water can also be used to bending RV or travel trailer trim. Simply boil a pot of water and then pour it over the area of trim that you want to bend.
Let it sit for a minute or two and then use your hands or a toolto shape it into the desired shape. Again, be careful not burn yourself with the hot water!
3. Use a hair dryer: A hair dryer can also be usedto bentrim if you don’t have access to a heat gun or boiling water .
Simply turnthe hair dryeron high and aimit atthe sectionoftrimthatyouwanttobend .Holditthereforafewsecondsuntiltheplasticbecomespliableandthenuseyourhandstoformittothewayyouwantit .
Whichevermethodyouchoose , justmake sureto work slowlyandcarefully sothatyoutrashthetrimintheprocess !
How Do You Seal an Rv Corner Trim?
RV corner trim is an important component in protecting your RV from the elements. The sealant you use will need to be able to withstand extreme temperatures and sunlight. Here are a few things to consider when choosing a sealant for your RV corner trim:
– First, choose a sealant that is specifically designed for RVs. There are many brands on the market, so do some research to find one that will work well for your needs.
– Make sure the sealant you choose can withstand high temperatures.
It’s important that the sealant does not break down in hot weather, as this can cause serious damage to your RV.
– UV resistance is also crucial. Sunlight can cause most sealants to degrade over time, so it’s important to choose one that won’t yellow or crack when exposed to the sun.
– Once you’ve selected a suitable sealant, follow the instructions on the packaging for best results. In general, you’ll want to clean the surface of the trim before applying the sealant, and then apply it evenly with a brush or roller.
How Do You Cut Corner Molding?
Before cutting any molding, it’s important to measure the wall so you know how much to cut. It’s also important to use a sharp blade so the cuts are clean. To cut corner molding, start by making a 45-degree cut at one end of the molding.
Then, line up the other end of the molding with the wall and make another 45-degree cut. Once both ends are cut, you can attach the molding to the wall using nails or screws.
How Do You Make Outdoor Corner Molding?
If you’re looking to add a touch of class to the exterior of your home, outdoor corner molding is a great way to do it. Corner molding can be used to accentuate features like porches and gables, or simply to add a decorative element to your home’s facade. Here are some tips on how to make outdoor corner molding:
1. Choose the right material. Outdoor corner molding is typically made from wood, PVC, or composite material. Wood is the most traditional option and can be stained or painted to match your home’s trim.
PVC and composite are more durable options that won’t rot or warp over time.
2. Measure twice, cut once. When cutting corner molding, it’s important to get precise measurements so that your pieces fit together perfectly.
Use a tape measure and mark each piece before cutting it with a saw.
3. Install with nails or screws. Once your pieces are cut, you can install them using finishing nails or deck screws depending on the material you’re using.
If you’re using wood molding, predrill pilot holes before nailing into place so that the wood doesn’t split.
4 .Caulk and paint (or stain) as desired .
To give your corner molding a finished look, caulk any gaps between the pieces and then paint or stain them as desired . Clear caulk will blend in with most trim colors , while white caulk will stand out more against dark-colored trim .
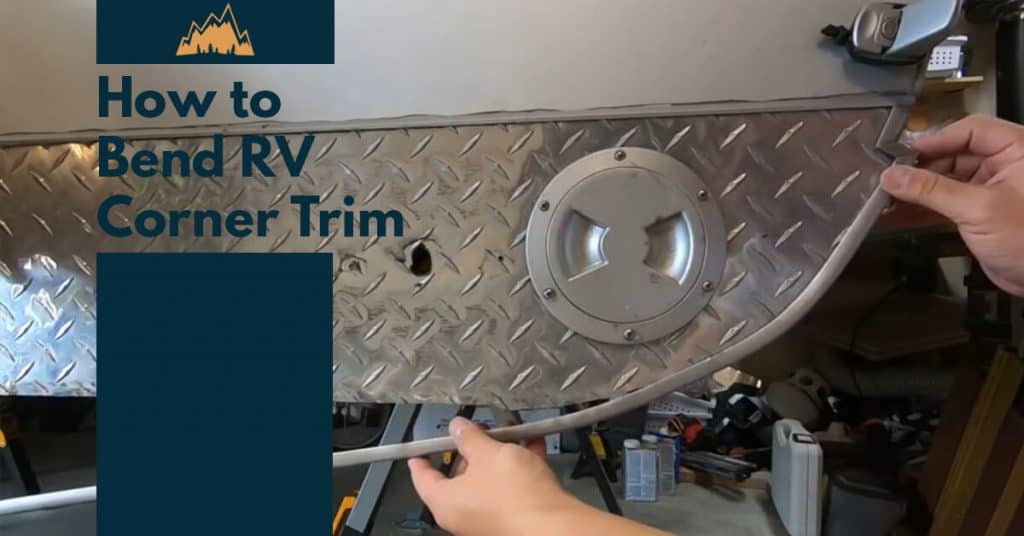
The final step, installing RV corner trim on truck camper.
Conclusion
If you’re looking to add a personal touch to your RV, one way to do it is by bending the corner trim. This can be done easily with a few tools and some patience. First, you’ll need to heat up the trim with a heat gun.
Once it’s pliable, use a wooden block or something similar to bend the trim into the shape you want. Allow it to cool before removing the block. You may need to repeat this process a few times to get the desired results.