1. Locate the solar panel wires and measure the length you need to secure them to the RV roof.
2. Cut two pieces of UV-resistant zip tie material that are twice the length of the wire plus 1 inch.
3. Place one zip tie around the wire at each end, making sure that there is at least 1 inch of material extending beyond the wire on each side.
4. Pull the zip ties tight and trim off any excess material with a sharp knife or scissors.
- Start by cleaning the area on the RV roof where you’ll be attaching the solar wires
- This will help ensure that the adhesive tape sticks properly
- Cut your adhesive tape to the desired length and place it along the RV roof, making sure that it’s centered over the area where the solar wires will be attached
- Place your solar wires on top of the adhesive tape, making sure that they’re evenly spaced out
- Use a roller or your hands to press down on the solar wires, ensuring that they’re securely attached to the adhesive tape
- That’s it! Your solar wires are now securely attached to your RV roof and ready to be used with your solar panel system
Rv Roof Wire Clips
If you have an RV, then you know that one of the most important things to keep in good condition is the roof. In order to do this, you need to regularly check and clean your RV roof wire clips. These are small metal clips that help to secure the wires that run along your RV roof.
Over time, these clips can become corroded or damaged, which can cause problems with your wiring. That’s why it’s important to inspect them regularly and replace them if necessary. Here’s a quick guide on how to do just that:
1. Begin by inspecting all of the wire clips on your RV roof. Look for any signs of corrosion or damage. If you see any, then it’s time to replace those clips.
2. To remove a corroded or damaged clip, use a pair of pliers to grip it firmly and twist until it comes free.
3. Take a new clip and insert it into the hole where the old one was located. Make sure that it’s inserted securely before moving on to the next step.
4. Use a pair of pliers or a screwdriver to tighten down each new clip until it’s snug against the wire insulation.
Rv Solar Wiring Through Refrigerator Vent
If you’re considering adding solar to your RV, one option is to wire the panels through your refrigerator vent. This can be a great option if you’re short on space, as it frees up roof space for other things like rooftop storage or awnings. It’s also relatively easy to do, and can be a great way to get started with solar if you’re new to the technology.
There are a few things to keep in mind if you go this route. First, make sure that your fridge vent is big enough to accommodate the size of solar panel you want to use. Second, since the panels will be mounted lower on the RV, they may be more susceptible to shading from trees or other objects.
This can reduce their effectiveness, so it’s important to position them carefully. Finally, it’s important to seal any openings around the wires where they pass through the fridge vent, as this will prevent moisture and pests from getting inside.
Overall, wiring your solar panels through your fridge vent can be a great way to save space and add solar power to your RV.
Just make sure to do your research ahead of time and take precautions against shading and moisture damage.
Solar Panel Wiring Through Roof
Solar panel wiring through roof is a great way to get your solar panels up and running. It is important to follow all the instructions carefully in order to avoid any mistakes. Make sure that you have all the necessary tools and materials before starting the project.
This includes a ladder, drill, screwdriver, wire stripper, and electrical tape. You should also have some knowledge about basic electricity and wiring before attempting this project.
The first step is to find the best location for your solar panels on your roof.
Once you have found the perfect spot, mark it off with a piece of tape so you know where to drill holes. Next, use the ladder to climb up onto your roof and drill pilot holes into the marked area. Be careful not to damage any shingles while doing this.
After drilling the pilot holes, insert screws into each one and tighten them down securely. Now it’s time to attach your solar panels. Place each panel against the screws and use wire nuts or other fasteners to secure them in place.
Once all of your panels are attached, connect the wires from each one together using electrical tape or wire connectors. Finally, connect these wires to an inverter inside your home and you’re ready to start generating power!
How to Run Solar Wires in Rv
If you’re considering adding solar panels to your RV, one of the first things you’ll need to do is figure out how to run the solar wires. Here are a few tips to help you get started:
1. Decide where you want to mount the panels.
This will determine how long of a wire you’ll need.
2. Choose the type of wire that best suits your needs. There are a few different types available, so make sure to do your research before making a purchase.
3. Connect the positive and negative wires from the panel to the corresponding terminals on your RV’s electrical system. Make sure all connections are secure and tight.
4. Test everything out before hitting the road!
Once everything is hooked up, turn on the power and make sure the panels are charging properly.
Rv Solar Panel Wire Routing
There are a few things to consider when routing solar panel wires on your RV. First, you’ll need to decide where you want to mount the panels. It’s important to choose a location that gets plenty of sunlight and is free of any obstructions.
Once you’ve decided on a location, use a drill to make pilot holes for the mounting screws. Then, use zip ties or another type of fastener to secure the wire beneath the panels.
The next step is connecting the wires to your RV’s electrical system.
This can be done at either the batteries or the main breaker panel. If you’re not comfortable working with electricity, it’s best to hire a professional electrician to do this part for you. Once everything is properly connected, flip the switch and enjoy powering your RV with solar energy!
Credit: www.rvwithtito.com
How Do You Secure Solar Panel Wires?
If you’re looking to secure your solar panel wires, there are a few different options available to you. You can use zip ties, tape, or even special solar panel clamps that are designed to hold the wires in place. Whichever method you choose, make sure that the wire is secured tightly so that it doesn’t come loose and cause any damage or hazards.
How Do I Secure My Solar Panels to My Rv Roof?
When you’re ready to install your solar panels on your RV, there are a few things you’ll need to do to make sure they’re properly secured. First, clean the area of your RV roof where the panels will be installed. This will help ensure that the panel’s adhesive bonds correctly.
Next, measure and mark the locations for the brackets that will hold your panels in place. Once the brackets are in place, you can then attach your solar panels using the provided mounting hardware. Finally, use sealant around the edges of each panel to help protect against leaks.
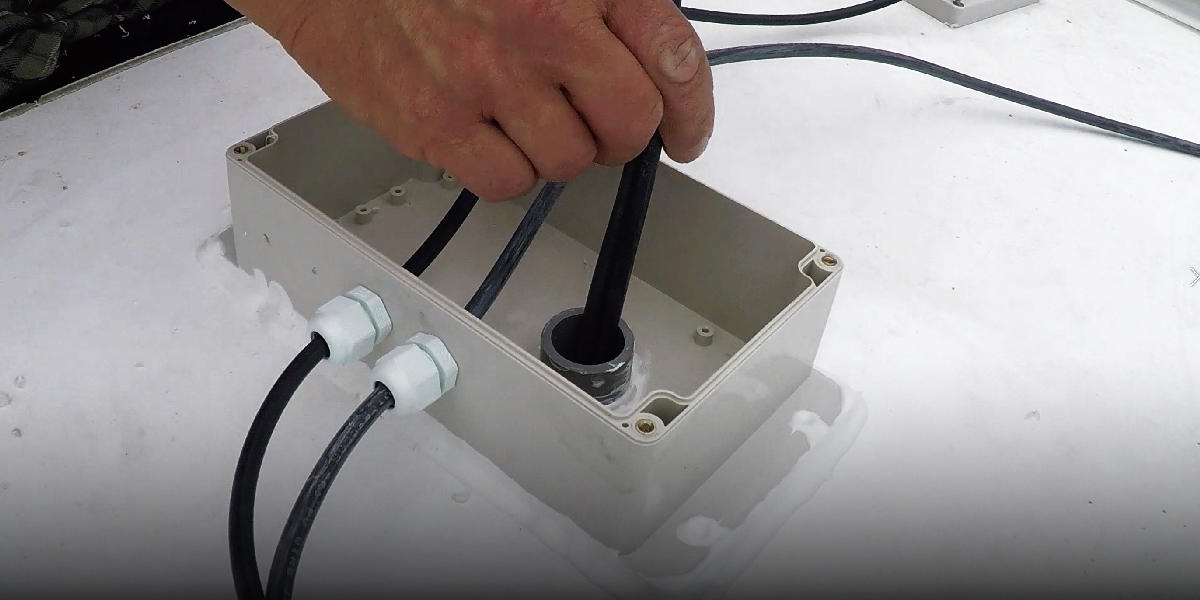
How Do You Run Cables Through an Rv Roof?
If you’re looking to run cables through your RV roof, there are a few things you’ll need to take into account. First, you’ll need to determine the thickness of your RV’s roof. This will dictate the size of the hole you’ll need to drill, as well as the type of sealant and fasteners you’ll use.
Second, you’ll need to consider the weight of the cables themselves. Heavier cables may require larger holes and stronger fasteners. Finally, you’ll need to think about weatherproofing.
Make sure your seals and fasteners can stand up to rain, snow, and sun exposure. With these factors in mind, follow these steps to run cables through your RV roof:
1) Measure the thickness of your RV’s roof and mark out where you want the cable(s) to exit.
Use a drill bit that is slightly smaller than the diameter of the planned hole(s).
2) Drill slowly and carefully at your marked location(s), being careful not to damage any existing wiring or plumbing inside your RV’s walls or ceiling. If possible, have someone help support the drill bit from below while you’re drilling from above.
3) Once your hole(s) is/are drilled, feed your cable(s) through from inside the RV (if possible) or from outside (being careful not to kink or damage them).
4) On both sides of each hole (inside and outside), apply a generous amount of sealant designed for RVs (typically silicone-based). Make sure all gaps and cracks are filled – this will help keep water and pests out.
5) Allow sufficient time for sealant/cablesto dry before continuing – refer to product instructions for drying times specific tp Sealant brand used .
6):Reattach any removable panels onthe outsideofyourRVandenjoyyournewlyruncable!
How Do You Mount Solar Panels on an Rv Roof Without Drilling?
If you’re looking to mount solar panels on your RV roof without drilling, there are a few different options available. One popular option is to use adhesive solar panel mounts. These mounts use high-strength adhesives to attach the panels to your roof, and they’re designed specifically for RVs.
Another option is to use magnetic solar panel mounts. These mounts attach to your RV’s metal roof with powerful magnets, and they’re also easy to remove when you need to access your roof. Whichever method you choose, make sure that you follow the instructions carefully and that you use high-quality materials to ensure a secure connection.
Cable Access Hole Through RV Roof // How To // Solar
Conclusion
If you want to add solar panels to your RV, there are a few things you need to do to make sure the wires are secure. First, use silicone caulk or electrical tape to seal any gaps around the edges of the solar panel. Then, run the wires through some type of conduit so they’re protected from weather and pests.
Finally, use zip ties or other fasteners to secure the wires to the roof. By following these steps, you can be confident that your RV’s solar system will be safe and reliable.