Have you ever tried to fix something on your Sea-Doo and felt overwhelmed? You’re not alone.
Removing the pad on the steering column might sound tricky, but with the right guidance, you can do it yourself with ease. This task is not just about enhancing your technical skills; it’s about taking control and gaining confidence in handling your watercraft.
Imagine the sense of accomplishment you’ll feel once you’ve done it on your own. You will discover a step-by-step process that simplifies the task, making it approachable and straightforward. Let’s dive into how you can remove the pad efficiently, ensuring your Sea-Doo is in top shape for your next adventure. Your Sea-Doo maintenance journey starts here!

Credit: www.facebook.com
Tools Needed
Removing the pad on the steering column of a Sea-Doo requires specific tools. Using the right tools ensures a safe and efficient process. This guide will help you gather all necessary tools.
Essential Tools
Start with a screwdriver set. It helps with removing screws securely. A wrench set is vital. It allows you to loosen bolts without damaging them. A soft cloth is necessary. It protects surfaces from scratches.
Optional Tools
A flashlight can be useful. It illuminates dark areas for better visibility. Needle-nose pliers may help. They are handy for gripping and pulling small parts. A magnetic tray can keep screws organized. It prevents losing small parts during the process.
Credit: www.promo-jetski.com
Safety Precautions
Ensure the Sea-Doo is on a stable surface before beginning. Disconnect the battery to prevent accidental activation. Use a screwdriver to gently remove screws holding the pad, keeping tools organized for reassembly.
Removing the pad on the steering column of a Sea-Doo might seem like a straightforward task, but it’s crucial to prioritize safety. Ensuring your safety while doing this task can prevent accidents and injuries. Let’s delve into the necessary safety precautions to keep you secure.Protective Gear
Wearing the right protective gear is essential. Safety goggles can prevent any debris or dust from getting into your eyes. Gloves will protect your hands from sharp edges and provide a better grip when handling tools. It’s also wise to wear long sleeves to avoid scratches. Consider what might happen if you skip protective gear. A small oversight could lead to discomfort or injury, slowing down your progress.Workspace Preparation
Prepare your workspace to make the process smoother and safer. Ensure you have a clean, flat surface where you can place tools and parts. Clear away any clutter that might pose a trip hazard. Think about the tools you’ll need. Arrange them neatly so you can access them easily. This not only speeds up the process but also reduces frustration. Finally, consider the lighting. Good illumination will help you see what you’re doing and prevent mistakes. Wouldn’t you agree that working in a well-lit area can boost your efficiency? When tackling any DIY task, safety should be your first priority. By equipping yourself with protective gear and preparing your workspace, you set the stage for a successful and safe steering column pad removal. What other safety measures do you think are essential for tasks like this?Locating The Steering Column Pad
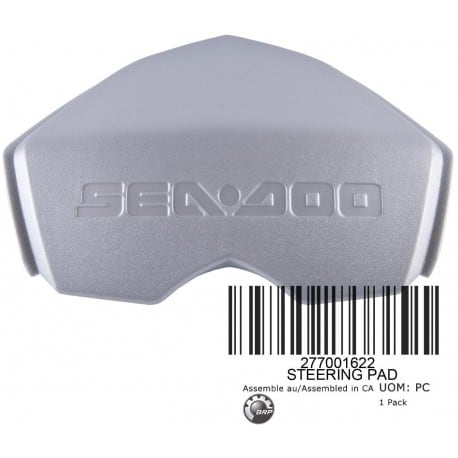
Find the steering column pad on your Sea-Doo for easy removal. It’s located above the handlebars. Gently detach it by loosening the screws or clips that hold it in place.
Locating the steering column pad on your Sea-Doo can seem a bit daunting, especially if it’s your first time. With a little guidance, you’ll find it’s a straightforward process. This task requires attention to detail and a bit of patience, but it’s entirely manageable with the right approach. ###Identifying The Pad
The steering column pad is a cushioned cover designed to protect the steering mechanism and provide comfort. It’s usually made from durable materials like foam or rubber. Look for a section around the base of the handlebars that appears padded or slightly raised. You might notice the pad is often secured with visible screws or clips. These fasteners ensure it stays firmly in place even when you’re tackling rough waters. If you’re unsure, consult your Sea-Doo’s manual for a visual reference. ###Access Points
Once you’ve identified the pad, it’s time to locate the access points. These are the areas where you can begin removing the pad. Typically, you’ll find them at the edges or underneath the pad itself. Look for small openings or gaps where a tool can be inserted. A flathead screwdriver or a similar tool is often needed to gently pry the pad away without causing damage. Remember to keep a light hand to avoid scratching your Sea-Doo’s surface. Are you feeling a bit apprehensive? That’s normal. Visualize the process as a puzzle, where each piece needs careful handling to fit perfectly. Take a deep breath, and remember, this is a learning experience. Once you’ve located the access points, you’re halfway to removing the pad successfully. Engage with the task by questioning how each step connects to the next. Why does the pad need to be removed? Is it for maintenance or perhaps an upgrade? This curiosity will guide you smoothly through the process, ensuring you not only complete the task but understand it thoroughly.Removing The Pad
Taking off the pad from the Sea-Doo steering column might seem tricky. With the right guidance, it becomes straightforward. Follow these steps carefully to ensure a smooth removal process.
Loosening Screws
The pad is held by screws that need loosening first. Grab a screwdriver that fits the screw heads. Start by turning each screw counterclockwise. This action will gradually loosen the pad’s hold. Be gentle to avoid stripping the screws. Once loose, keep them safe for reinstallation.
Detaching Clips
After loosening screws, focus on detaching the clips. These clips secure the pad in place. Locate each clip around the steering column. Use a flat tool to gently pry them open. The pad will begin to detach as clips release. Exercise caution to prevent breaking the clips. Proper detachment ensures easy reassembly later.
Inspecting The Steering Column
When you’re gearing up to remove the pad on your Sea-Doo’s steering column, the first crucial step is inspecting the steering column itself. This task ensures that you’re not only prepared for a smooth removal but also ready to spot any potential issues early on. Think of it like examining a treasure map before embarking on an adventure; you want to make sure you’re headed in the right direction and not missing any critical clues.
Checking For Damage
Begin by closely examining the steering column for any signs of wear or damage. Look for scratches, dents, or any unusual marks. These could be indicators of larger issues lurking beneath the surface.
Pay special attention to the areas around the pad. If you notice any cracks or fractures, it might be time to consider some repairs before proceeding with the pad removal. Ensuring your steering column is in top shape can prevent future headaches.
Ask yourself: Is there anything that looks out of place or concerning? Identifying damage early can save you time and effort down the road.
Cleaning The Area
Once you’ve checked for damage, it’s time to clean the area around the steering column. A clean surface makes removal easier and ensures you have a clear view of everything you’re working with.
Use a mild cleaner and a soft cloth to gently wipe away any dirt or grime. Avoid harsh chemicals that could damage the materials. A clean steering column is not just about aesthetics; it’s crucial for a smooth removal process.
Consider how much easier it is to work with a clean surface. It’s like having a clear desk when you’re trying to focus—everything is just simpler and more efficient.
Engage your senses: Can you feel the difference in texture as you clean? A smoother surface often means you’re ready to tackle the removal with ease.

Credit: m.youtube.com
Reinstalling Or Replacing The Pad
Removing the pad on the steering column of a Sea-Doo is just part of the process. Once the old pad is off, the next step involves reinstalling or replacing it. A new pad can enhance the Sea-Doo’s look and feel. It also ensures you maintain safety and comfort while riding.
Choosing A New Pad
Select a pad that fits your Sea-Doo’s model. Check the material. It should be durable and water-resistant. The color should match or complement your Sea-Doo’s design. Some pads offer extra grip, which helps in wet conditions. Always choose a trusted brand for reliability.
Securing The Pad
Start by aligning the pad on the steering column. Ensure it fits snugly. Use screws or clips if provided. Tighten them securely. This prevents the pad from shifting during rides. Double-check all fasteners before heading out. A well-secured pad adds comfort and safety.
Testing The Installation
After removing the pad from the Sea-Doo steering column, proper testing is essential. Ensuring everything works as expected is crucial for a smooth and safe ride. This section dives into necessary checks to guarantee a successful installation.
Functionality Check
First, examine the steering wheel’s movement. Does it rotate smoothly without obstruction? Test it by turning left and right. Listen for unusual sounds or resistance. Ensure the wheel’s range of motion feels natural and responsive.
Next, inspect the electronic controls. Start the Sea-Doo and check buttons on the steering column. Confirm that they activate functions correctly. Verify lights, horn, and other features operate as intended. This step ensures full functionality after the pad removal.
Safety Verification
Safety checks are vital. Begin by ensuring the steering column is stable. Gently shake it and observe any excessive movement. If it feels loose, tightening may be required.
Examine the steering wheel’s alignment. Confirm it points straight when the Sea-Doo is stationary. Misalignment can affect handling and safety. Adjust as necessary to ensure accurate control.
Finally, test the Sea-Doo in a controlled environment. Ride at low speed, paying attention to steering response. Ensure all systems function correctly during the ride. Confidence in your Sea-Doo’s performance ensures a safe and enjoyable experience.
Frequently Asked Questions
How Many Hours Is Too Many On A Sea Doo?
Sea-Doo engines typically last around 300-400 hours. Regular maintenance extends their lifespan. Excessive hours can indicate potential wear or issues. Always check the condition and maintenance history before purchasing a used Sea-Doo. Proper care ensures longer engine life and optimal performance.
Is A Seadoo Gtx A 3 Seater?
Yes, the Seadoo GTX is a 3-seater personal watercraft. It’s designed for comfort and stability, perfect for families and friends. Enjoy smooth rides with its spacious seating and advanced features. Ideal for water adventures.
How To Adjust Jet Ski Steering?
To adjust jet ski steering, locate the steering cable and loosen the locknut. Adjust the alignment by turning the cable. Tighten the locknut once aligned. Test the steering for smooth operation. Always consult the owner’s manual for specific instructions related to your jet ski model.
How Do I Start Removing The Steering Column Pad?
Begin by ensuring the Sea-Doo is on a stable surface. Disconnect the battery for safety. Use a screwdriver to carefully remove any visible screws securing the pad. Gently pry the pad away from the steering column, taking care not to damage any surrounding components.
Conclusion
Removing the pad on a Sea-Doo steering column is straightforward. Follow the steps carefully for best results. Ensure you have the right tools on hand. This task requires patience and attention. Safety should always come first. Use protective gear as needed.
Once removed, inspect the area for damage. Regular maintenance keeps your Sea-Doo in top condition. Proper care extends its lifespan. Enjoy smoother rides on your adventures. With practice, this process becomes simpler. You’ll gain confidence in handling small repairs. Keep learning and exploring.
Happy riding!